Documentation
Parametric Brass Heat-Set Insert Library for Shapr3D
Technical documentation and variable reference for a fully parametric brass heat-set insert library in Shapr3D.
Technical Documentation & Variable Reference
A fully parametric CAD library for generating ISO metric brass heat-set inserts in Shapr3D, covering all 18 sizes from M2×2×3.2 through M6×10×8. Change three input values — thread size, length, and outer diameter — and every dimension of the insert updates automatically, including the helical knurls, internal threads, chamfers, pilot geometry, and necked gap. Input variables carry a _changeMe suffix so it's obvious at a glance which three fields you actually edit; everything else is derived.
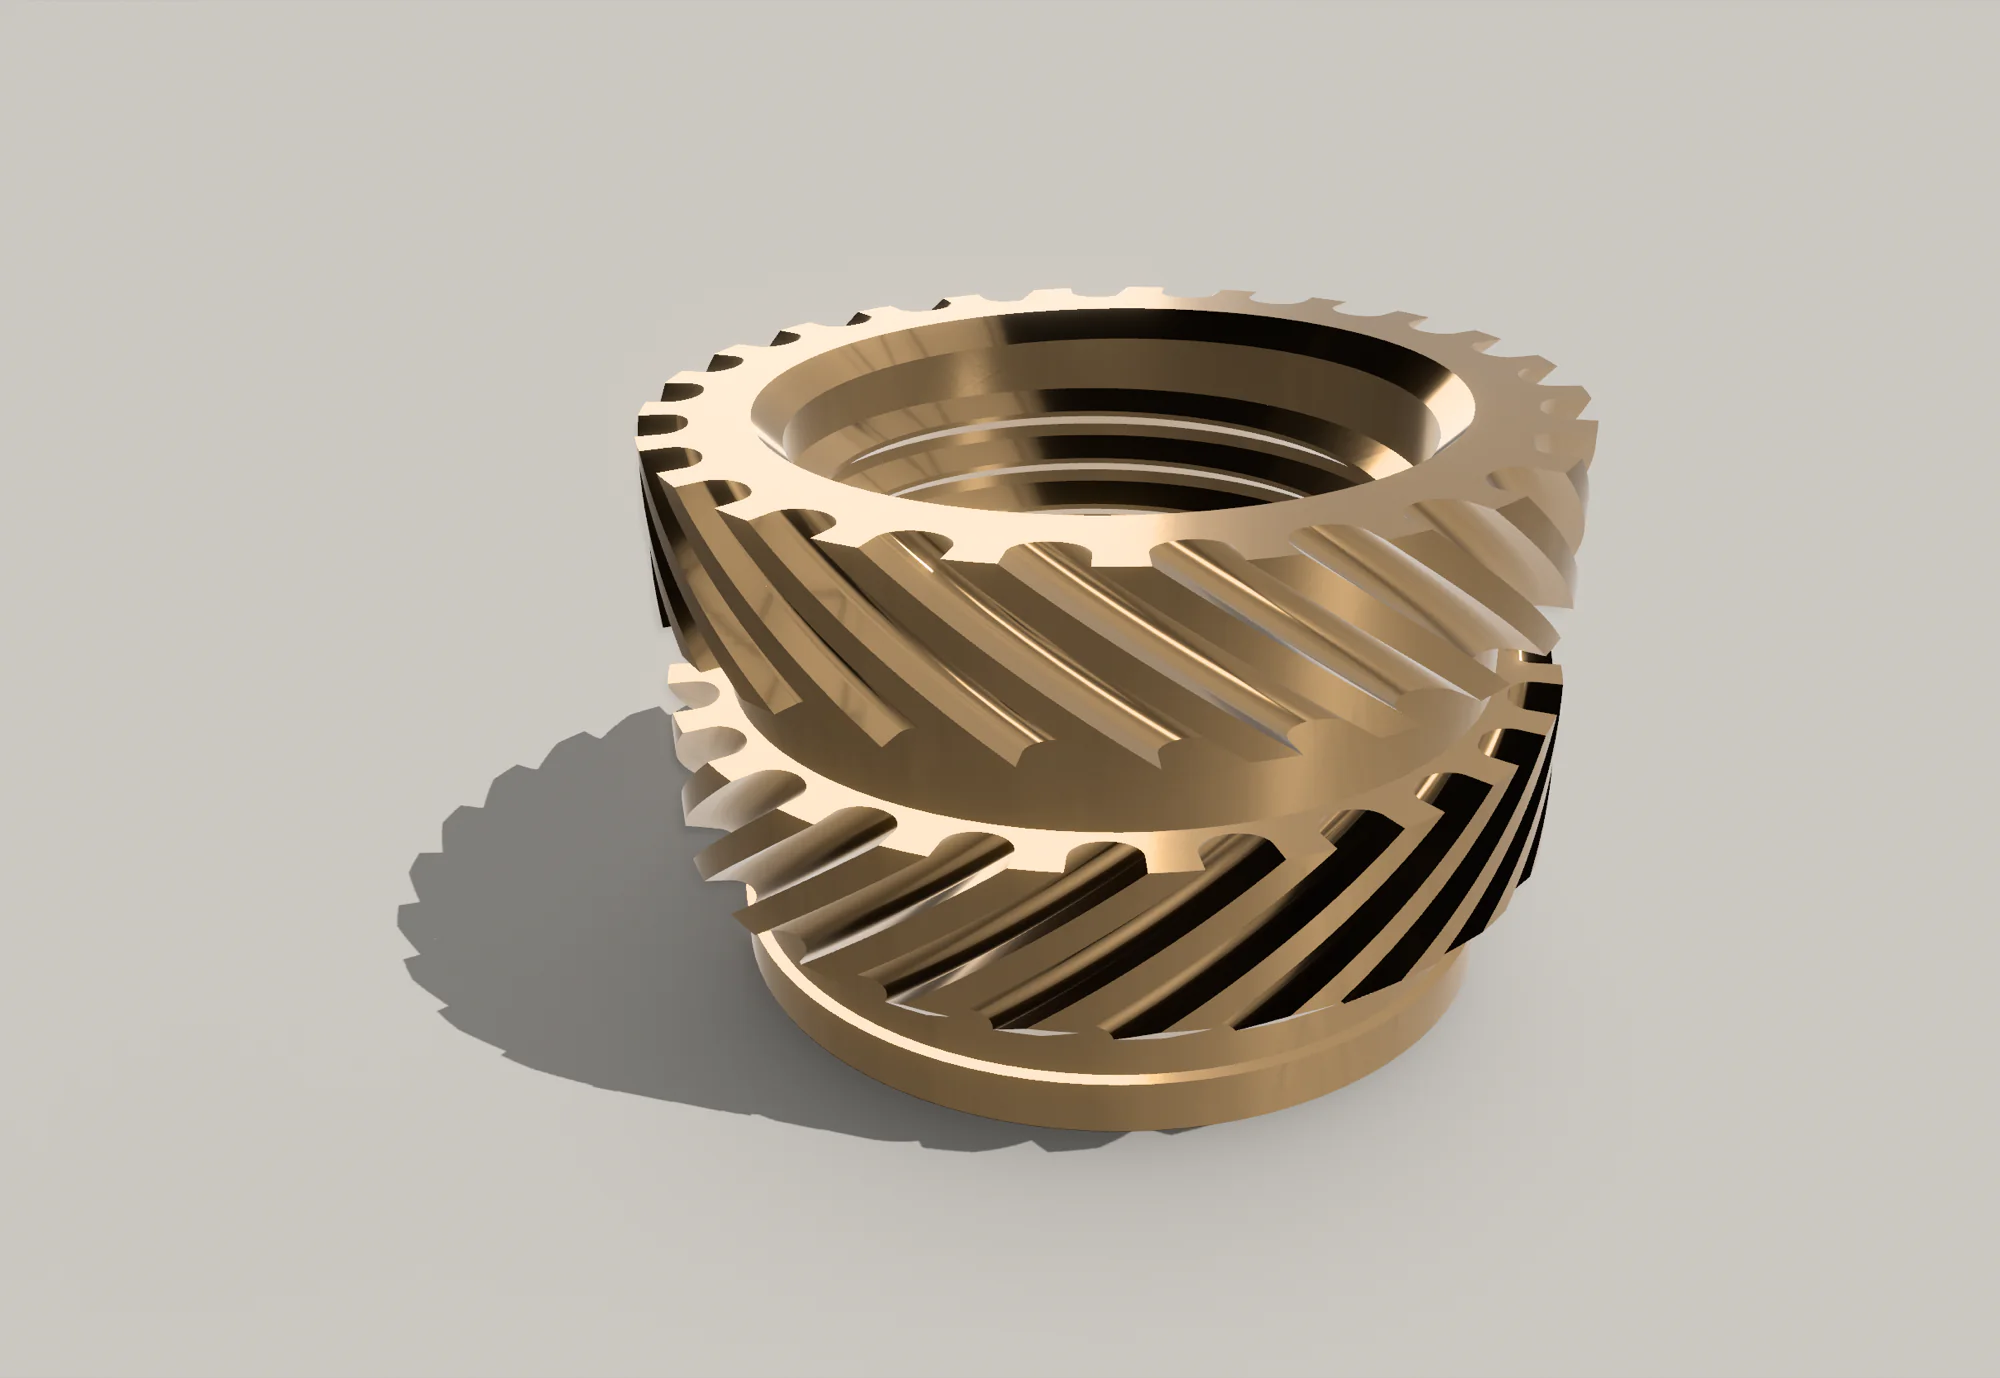
This document describes every variable in the file, the formulas that drive them, the design decisions behind each choice, and the practical limits of the current model. It is intended as a technical reference for using and adapting the released design files.
Downloads: Printables · GrabCAD
Table of Contents
- Overview
- Supported Size Range
- Quick Start
- Complete Variable Reference
- The Pitch Formula
- File Structure and Scope
- Known Limitations
- Customization Guide
- Files Included
- Credits and License
Overview
Heat-set brass inserts are small knurled cylinders that get melted into 3D-printed plastic parts to provide durable metal threads for screws. They're a staple of the 3D printing ecosystem because printed plastic threads are weak and wear out quickly, while brass threads are strong, reusable, and self-lubricating.
The "double-knurled" style this library models is the most common variant sold in assortment kits. It has:
- A pilot end with a stepped shape that self-aligns during installation
- A lower knurl band with diagonal grooves
- A necked gap between the two knurl bands
- An upper knurl band with diagonal grooves running the opposite direction
- Internal threads matching standard ISO metric coarse (ISO 261)
The library generates dimensionally accurate models of this style across the entire M2–M6 range, with every feature parameterized so a single file can be reused for all 18 common sizes.
Supported Size Range
The library is calibrated for these nominal sizes:
| Thread | Available Lengths × Outer Diameters |
|---|---|
| M2 | 2×3.2, 4×3.2, 6×3.2, 8×3.2 |
| M2.5 | 2.5×3.5, 4×3.5, 6×3.5 |
| M3 | 4×4.2, 6×4.2, 8×4.2, 10×4.2 |
| M4 | 6×6, 8×6, 10×6 |
| M5 | 6×7, 8×7 |
| M6 | 8×8, 10×8 |
Notation is M{thread} × {length} × {outer diameter} in millimeters.
The ratios were derived from measurements of a 440-piece INCLY assortment kit. Other suppliers may use slightly different proportions. See Customization Guide for how to adapt.
The 18 sizes above are the ones physically measured and tested from that kit. The practical limit of the library is the pitch lookup (see The Pitch Formula), which covers M2–M6 coarse threads — any standard double-knurled brass insert in that thread range can be generated by changing the three inputs.
Quick Start
- Open the Shapr3D file.
- Open the Variables panel from the History sidebar.
- Change exactly three variables — the ones with the
_changeMesuffix:threadSize_changeMe— the M number as mm (2, 2.5, 3, 4, 5, or 6)length_changeMe— total insert length in mmouterDiameter_changeMe— outer diameter of the brass body in mm
- All other dimensions recompute automatically. The model updates in real time.
- Export as STEP, STL, or your preferred format.
That's it. The _changeMe suffix is a deliberate UX cue — if it doesn't have that suffix, you don't need to touch it unless you're adapting the library for a different supplier's inserts.
Complete Variable Reference
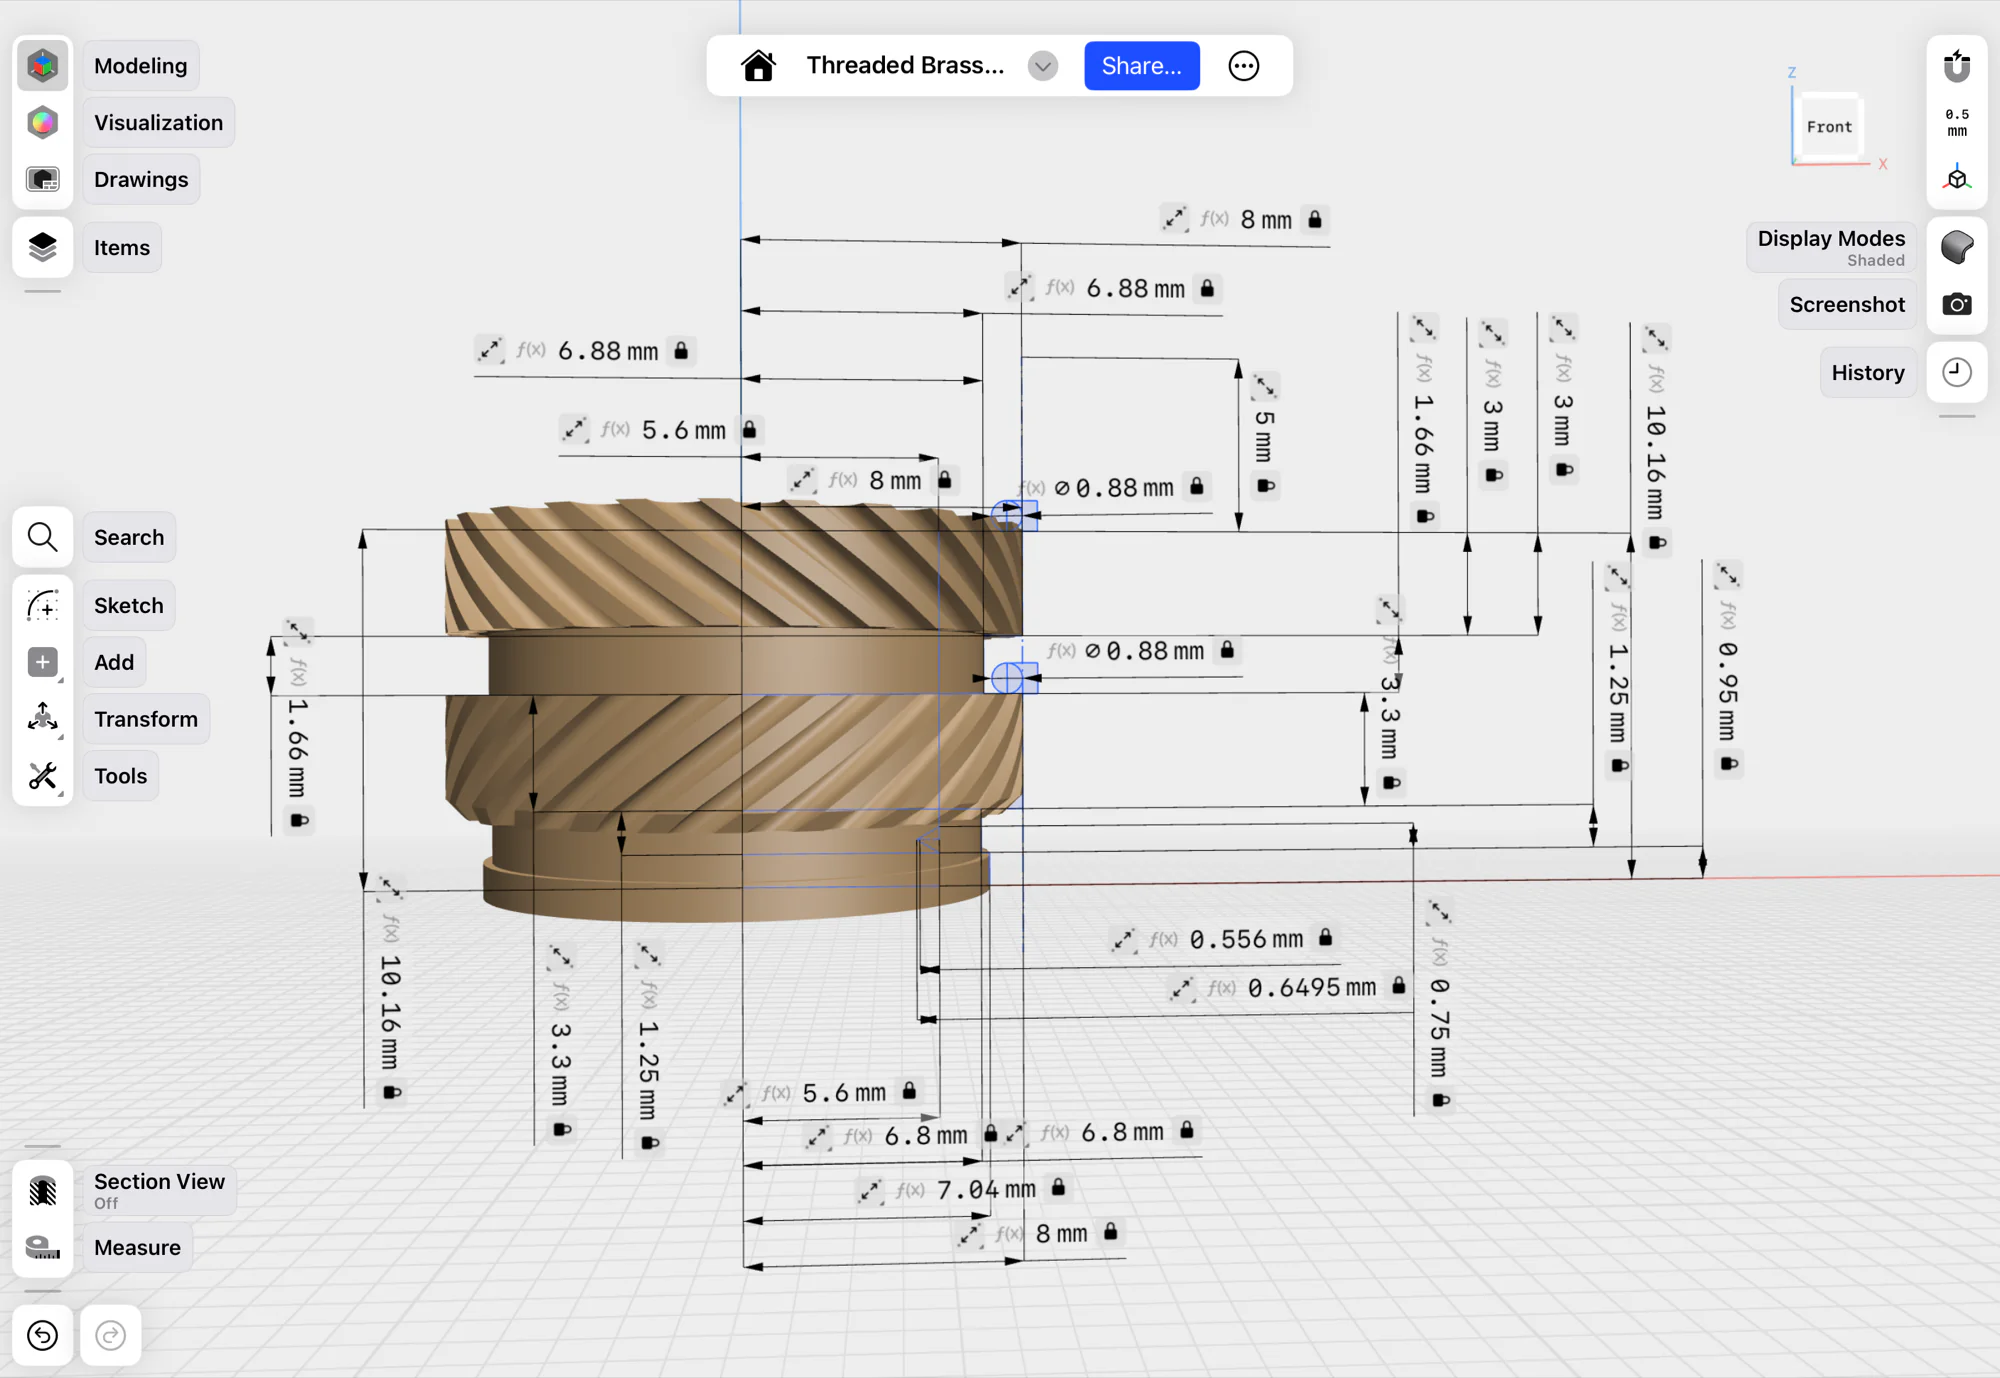
Input Variables
These are the three variables you change when generating a new size. They carry a _changeMe suffix so they stand out in the Variables panel — every other variable is derived and shouldn't be edited by hand.
| Variable | Type | Description |
|---|---|---|
threadSize_changeMe |
Length | The M-number as mm (2, 2.5, 3, 4, 5, or 6). |
length_changeMe |
Length | Total axial length of the insert in mm. |
outerDiameter_changeMe |
Length | Outer diameter of the brass body (the widest point of the knurl bands) in mm. |
pitch |
Length | Thread pitch. Auto-computed from threadSize_changeMe via the pitch lookup formula. Don't edit. |
Derived Radius Variable
Shapr3D revolves around an axis and therefore works in radii, not diameters. A single derived value bridges the OD input to the radius-based sketch:
| Variable | Formula | Purpose |
|---|---|---|
outerRadius |
outerDiameter_changeMe / 2 |
Half the outer diameter. Every other radial value downstream is expressed as a fraction of this. |
Body Length Proportions
The insert length is divided into five axial zones, each scaled as a fraction of length_changeMe. These ratios were derived by measuring a physical M6×10×8 insert and verified across the other sizes in the assortment kit.
| Variable | Formula | M3×8×4.2 value |
|---|---|---|
upperKnurlLength |
length_changeMe * 0.30 |
2.4 mm |
gapLength |
length_changeMe * 0.166 |
1.328 mm |
lowerKnurlLength |
length_changeMe * 0.33 |
2.64 mm |
pilotUpperLength |
length_changeMe * 0.125 |
1.0 mm |
pilotLowerLength |
length_changeMe * 0.095 |
0.76 mm |
These five zones add up to length × 1.016, which accounts for the typical 1.6% manufacturing over-run observed in the assortment kit inserts: nominal 10 mm inserts physically measured closer to 10.16 mm. If this doesn't match your supplier, adjust the ratios. See Customization Guide.
Body Radius Proportions
The insert has three distinct radial tiers, each expressed as a fraction of outerRadius. All values are radii (distance from the centerline axis to the surface), not diameters — this is what the revolve sketch consumes.
| Variable | Formula | M3×8×4.2 value | Purpose |
|---|---|---|---|
gapRadius |
outerRadius * 0.86 |
1.806 mm | Necked gap between the two knurl bands |
pilotUpperRadius |
outerRadius * 0.83 |
1.743 mm | Narrowest point of the pilot (the upper neck) |
pilotLowerRadius |
outerRadius * 0.88 |
1.848 mm | The locating lip at the very tip |
The knurl bands themselves sit at the full outerRadius. There's no variable for this because it's just outerDiameter_changeMe / 2.
Thread Geometry
The internal threads are real ISO metric coarse helical threads, modeled by revolving a triangular profile up through the bore. The bore starts as a smooth cylinder at the tap drill diameter, and the triangle cuts helical valleys into it.
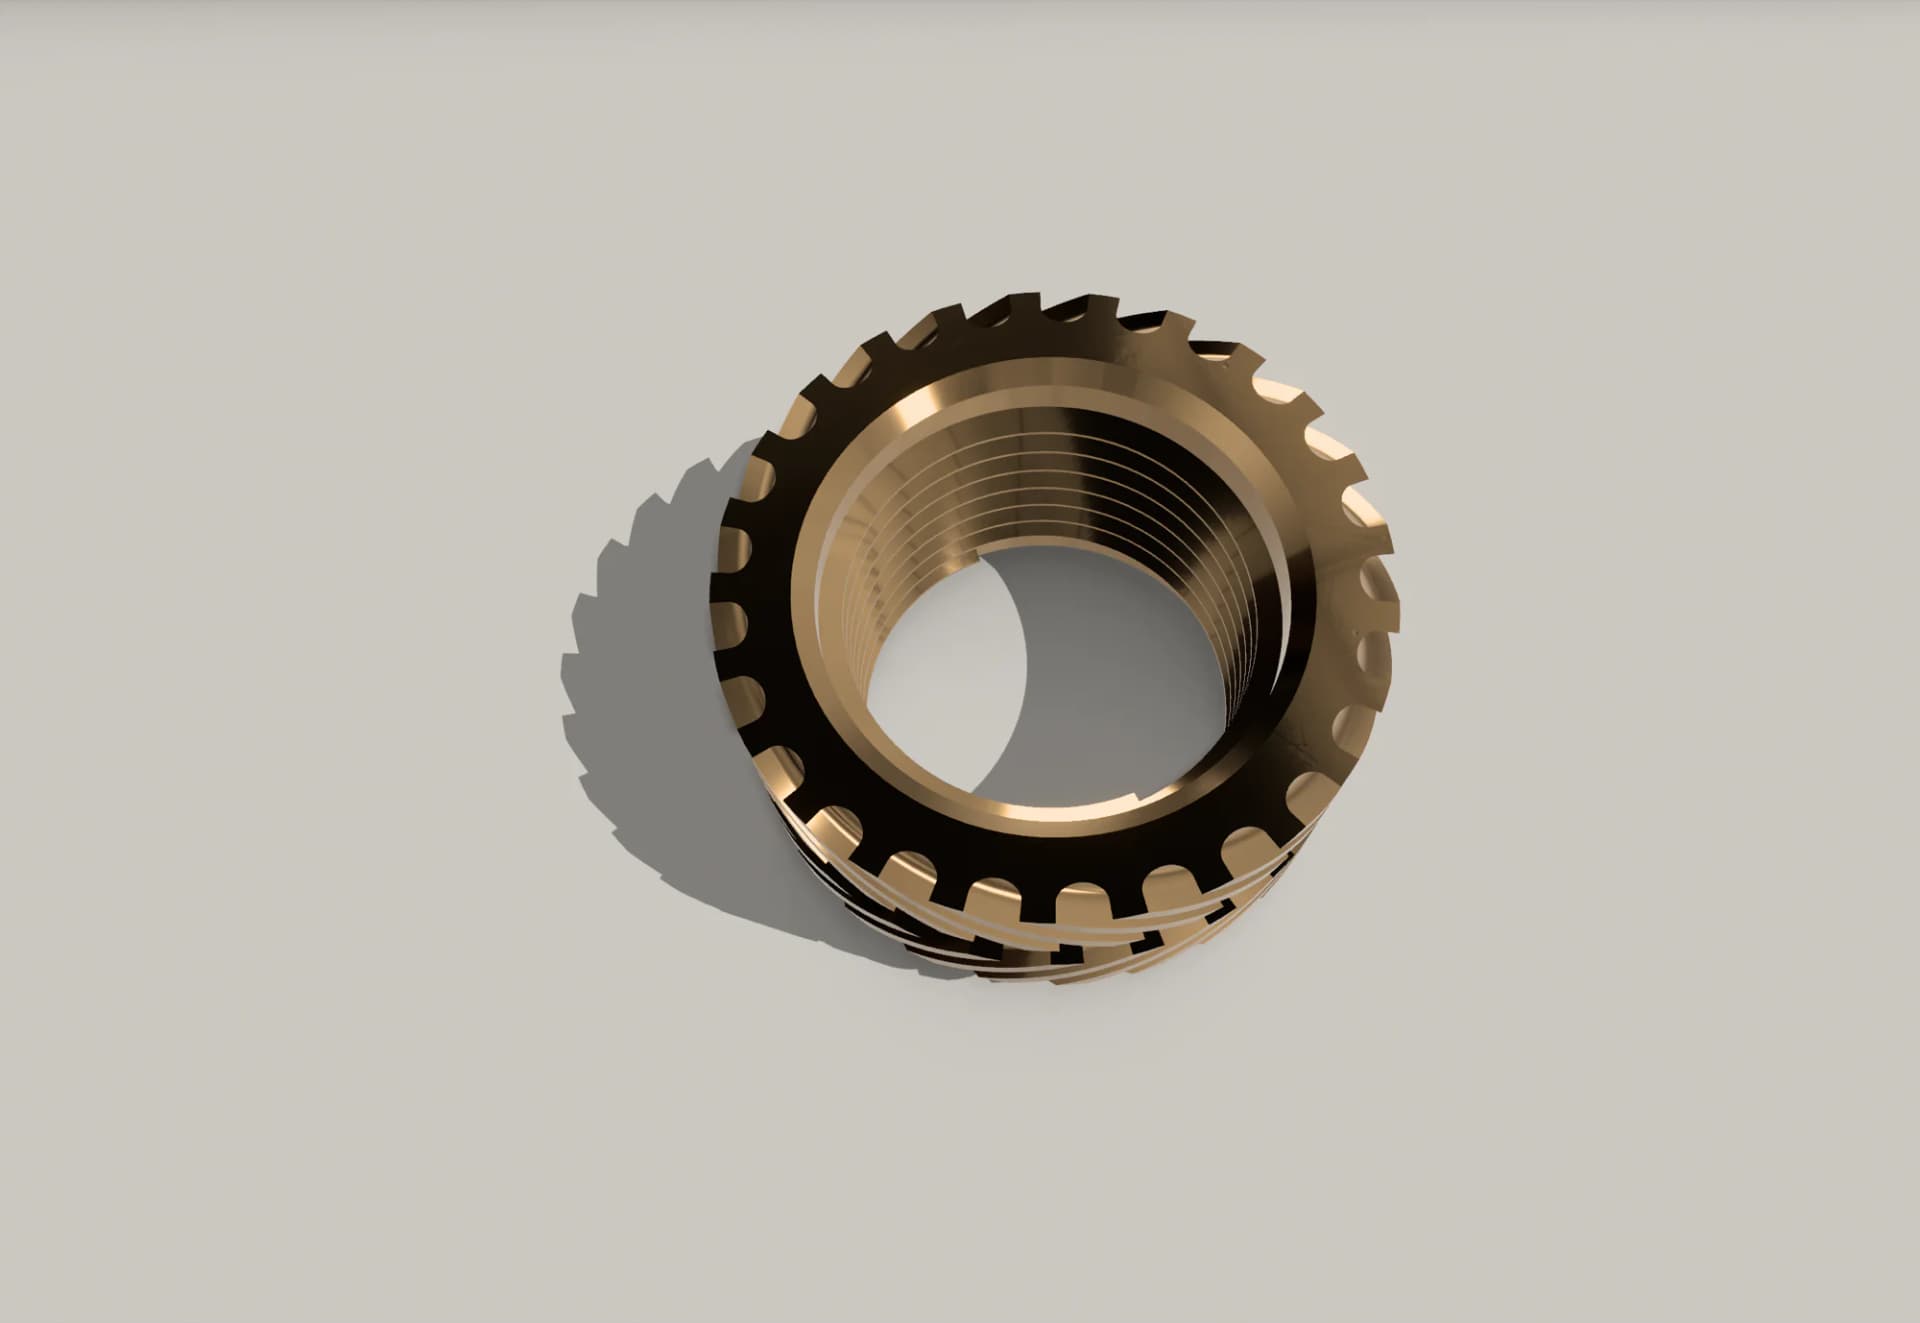
| Variable | Formula | M3×8×4.2 value | Purpose |
|---|---|---|---|
boreRadius |
(threadSize_changeMe - pitch) / 2 |
1.25 mm | Inner bore radius — ISO tap drill diameter ÷ 2. For M3, bore Ø = 2.5 mm. |
threadLength |
length_changeMe * 0.8 |
6.4 mm | Portion of the insert that gets threads cut into it |
baseWidth |
pitch * 0.75 |
0.375 mm | Axial length of the triangle base (on the bore wall) |
threadDepth |
baseWidth * 0.866 |
0.3248 mm | Radial depth of the triangle (keeps apex at exactly 60°) |
revolveAngle |
threadLength / pitch * 360 deg |
4,608° | Total revolve rotation (one full turn per pitch period) |
Why baseWidth = pitch × 0.75 instead of pitch: Using the full pitch for the triangle base causes adjacent thread profiles to touch at their corners during the revolve, which Shapr3D rejects with an "invalid contact" error. Shrinking the base to 75% of pitch leaves small crest flats between adjacent threads, which is how real ISO threads are actually shaped anyway. The 25% reduction in base width gets redistributed as uncut bore wall, crest flats, at the top and bottom of each pitch period.
Why threadDepth = baseWidth × 0.866 instead of pitch × 0.866: The 0.866 multiplier, √3/2, is what makes a triangle's apex exactly 60°, but it has to be applied to whatever the base actually is. If base shrinks to pitch × 0.75, depth must also shrink to (pitch × 0.75) × 0.866 = pitch × 0.6495 to preserve the 60° angle. Driving depth from baseWidth instead of pitch keeps them synchronized automatically. You can change the 0.75 multiplier later and depth updates on its own.
Why revolveAngle is written as ... * 360 deg: Shapr3D is strict about unit types. threadLength / pitch is dimensionless, length divided by length, and you can't multiply a dimensionless scalar by a plain number to get an angle. The deg suffix forces 360 to be interpreted as an angle, and scalar × angle = angle, which is what the Revolve tool expects.
Chamfers
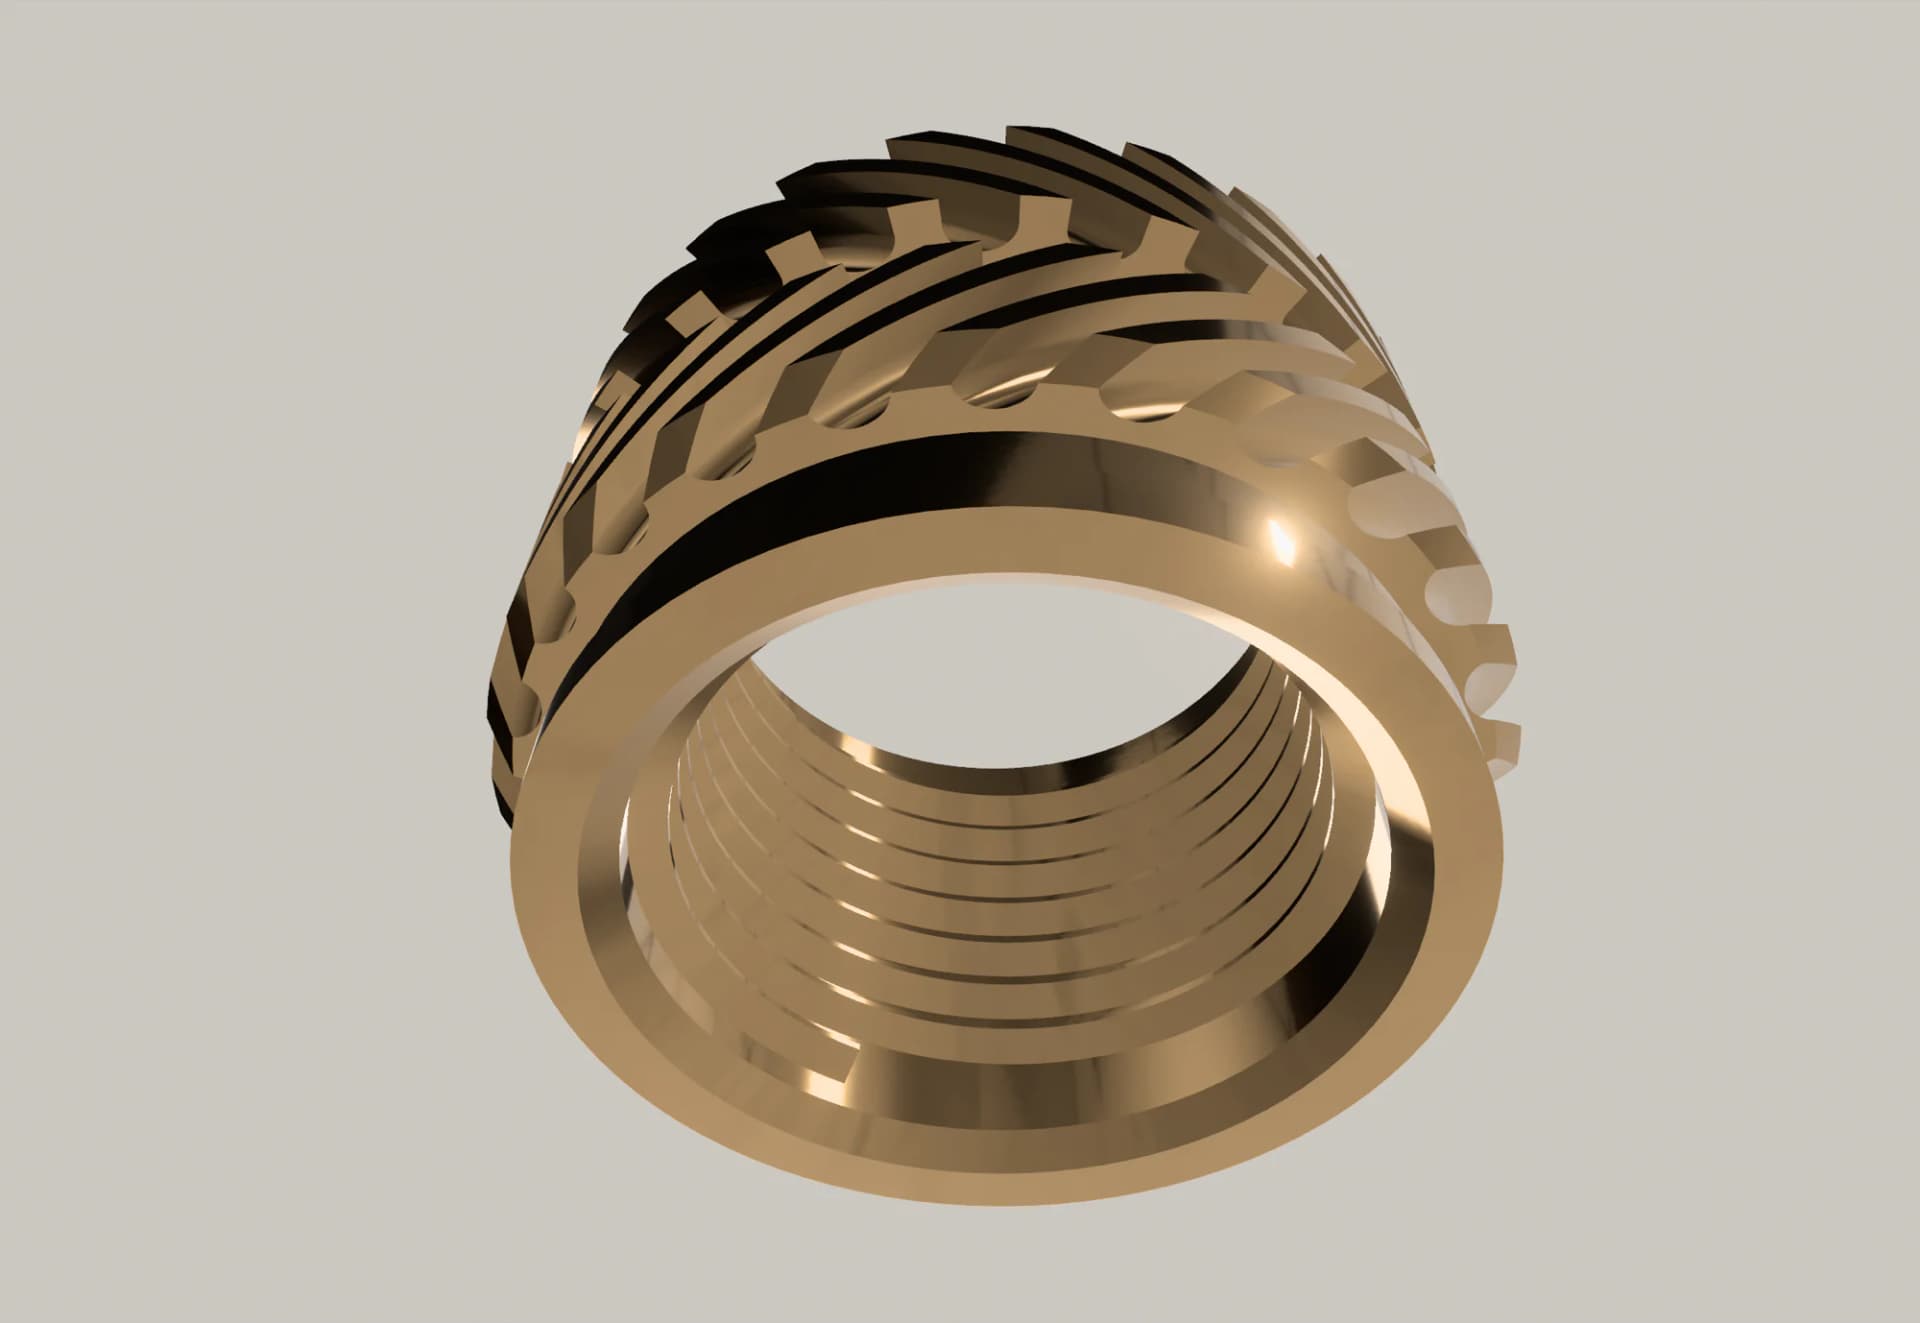
The top and bottom of the bore get 45° chamfers to create a lead-in for screws and to smoothly terminate the internal threads.
| Variable | Formula | M3×8×4.2 value | Purpose |
|---|---|---|---|
chamferSize |
pitch * 0.5 |
0.25 mm | Equal-distance chamfer size for both top and bottom bore edges |
The chamfer opens the bore mouth by chamferSize radially on each side, creating a clean lead-in and smoothly terminating the internal threads at both ends. For M6 (pitch = 1 mm) this is 0.5 mm, opening the bore from a 5 mm tap drill up to the 6 mm nominal thread diameter — standard machining practice for tapped holes.
Knurl Grooves
The diagonal grooves on the two knurl bands are created by sketching a small circle in a square, revolving it along a short helical path to form a single groove, then circular-patterning that groove around the insert. The revolve angle is no longer hardcoded at 45° — it now scales with the insert's length-to-OD ratio so short/fat inserts get shallower grooves and tall/thin ones get steeper grooves.
Groove size and count:
| Variable | Formula | M3×8×4.2 value | Purpose |
|---|---|---|---|
grooveCount |
floor(outerDiameter_changeMe * 3.14 / 1 mm) |
13 | Number of grooves in the circular pattern |
grooveByOD |
outerRadius * 0.11 |
0.231 mm | Ideal groove diameter based on the radius-scaled sketch |
grooveByGap |
gapLength * 0.8 |
1.0624 mm | Maximum groove diameter that still fits within the gap |
grooveDiameter |
(grooveByOD + grooveByGap - abs(grooveByOD - grooveByGap)) / 2 |
0.231 mm | Final groove diameter — the smaller of grooveByOD and grooveByGap |
Groove angle (scales with aspect ratio):
| Variable | Formula | M3×8×4.2 value | Purpose |
|---|---|---|---|
grooveAngleRaw |
length_changeMe / outerDiameter_changeMe * 60 deg |
114.3° | Raw angle from the insert's length-to-OD ratio |
grooveAngleMax |
100 deg |
100° | Upper cap on the final groove angle |
grooveAngle |
(grooveAngleRaw + grooveAngleMax - abs(grooveAngleRaw - grooveAngleMax)) / 2 |
100° (capped) | Final revolve angle — the smaller of grooveAngleRaw and grooveAngleMax |
Use grooveAngle for both the upper and lower knurl revolves, flipping the height direction between them to get the two opposing groove slopes.
Why grooveCount uses floor(OD × π / 1 mm): Groove density should be constant around the circumference, not a fixed count. Larger inserts have more circumference and need more grooves to look right, while smaller inserts need fewer. The formula gives roughly one groove per 1 mm of circumference, which visually matches the reference inserts. The / 1 mm strips the length unit so floor() operates on a plain number.
Why grooveByOD is driven by outerRadius, not outerDiameter: The 0.11 multiplier was calibrated against the radius value used in the revolve sketch. If this were driven off outerDiameter_changeMe instead, the grooves would be roughly twice the intended size and would cut through the gap zone into the knurl bands.
Why grooveDiameter uses a min() workaround: Shapr3D has no min() function, so the algebraic identity min(a, b) = (a + b - |a - b|) / 2 is used instead. This caps the groove diameter at whichever is smaller: the OD-based value, good for most sizes, or 80% of the gap length, which prevents grooves from spilling into adjacent knurl bands on small, squat inserts like M2×2×3.2. Without this cap, the M2×2×3.2 groove circle would be slightly wider than the gap between its knurl bands, and the revolve would chew into the wrong zone.
Why grooveAngle uses length-to-OD ratio: A single hardcoded 45° angle looked fine on the M6×10×8 I first measured, but the slope read wrong on squat inserts (M2×2×3.2) and too lazy on tall ones (M6×10×8). The length-to-OD ratio is a cheap proxy for "how tall-and-thin is this insert," and calibrating at × 60 deg makes a perfectly square (ratio = 1.0) insert like M4×6×6 or M6×8×8 land on 60°. Everything else scales from there.
Why the 100 deg cap: Tall, thin inserts like M2×8×3.2 (ratio = 2.5) compute to grooveAngleRaw = 150°, which would wrap the groove so far around the insert that it effectively reverses direction. Capping at 100° prevents that failure mode. The cap is applied with the same min() identity used for grooveDiameter. Six of the 18 sizes hit the cap — all tall variants of small-OD inserts.
Tuning: Increase the 60 deg multiplier for steeper grooves everywhere, decrease it for shallower ones. Raise or lower grooveAngleMax to allow more or less extreme angles. Both are single-number edits that propagate across every size.
Resulting groove angles across the library
| Insert | L ÷ OD | grooveAngle |
|---|---|---|
| M2×2×3.2 | 0.63 | 37.5° |
| M2×4×3.2 | 1.25 | 75.0° |
| M2×6×3.2 | 1.88 | 100.0° (capped) |
| M2×8×3.2 | 2.50 | 100.0° (capped) |
| M2.5×2.5×3.5 | 0.71 | 42.9° |
| M2.5×4×3.5 | 1.14 | 68.6° |
| M2.5×6×3.5 | 1.71 | 100.0° (capped) |
| M3×4×4.2 | 0.95 | 57.1° |
| M3×6×4.2 | 1.43 | 85.7° |
| M3×8×4.2 | 1.90 | 100.0° (capped) |
| M3×10×4.2 | 2.38 | 100.0° (capped) |
| M4×6×6 | 1.00 | 60.0° |
| M4×8×6 | 1.33 | 80.0° |
| M4×10×6 | 1.67 | 100.0° (capped) |
| M5×6×7 | 0.86 | 51.4° |
| M5×8×7 | 1.14 | 68.6° |
| M6×8×8 | 1.00 | 60.0° |
| M6×10×8 | 1.25 | 75.0° |
The Pitch Formula
ISO 261 metric coarse thread pitches don't follow a clean mathematical relationship to thread size:
| Thread Size | Pitch |
|---|---|
| M2 | 0.40 mm |
| M2.5 | 0.45 mm |
| M3 | 0.50 mm |
| M4 | 0.70 mm |
| M5 | 0.80 mm |
| M6 | 1.00 mm |
There's no simple formula that maps M2 → 0.40 and M6 → 1.00 and all the values between them. Shapr3D has no if-statements or lookup tables either. The workaround is to build a lookup using the sign() and abs() functions:
pitch = (0.4  * (1 - sign(abs(threadSize_changeMe - 2   mm)))
       + 0.45 * (1 - sign(abs(threadSize_changeMe - 2.5 mm)))
       + 0.5  * (1 - sign(abs(threadSize_changeMe - 3   mm)))
       + 0.7  * (1 - sign(abs(threadSize_changeMe - 4   mm)))
       + 0.8  * (1 - sign(abs(threadSize_changeMe - 5   mm)))
       + 1    * (1 - sign(abs(threadSize_changeMe - 6   mm)))) mm
How it works: Each term evaluates to 1 when threadSize_changeMe equals the target value, because 1 - sign(abs(0)) = 1 - 0 = 1, and 0 otherwise, because 1 - sign(abs(nonzero)) = 1 - 1 = 0. Multiplying by the desired pitch value and summing all six terms gives a selector. Exactly one term is nonzero at any time, and its coefficient becomes the output. The final mm suffix converts the scalar result back into a length.
Known limitations of this approach:
- Only works for exact matches. Setting
threadSize_changeMe = 3.5, which isn't a real ISO size but might be typed by mistake, returns pitch = 0, which will break downstream calculations. The formula only recognizes the six values baked into it. - Adding more sizes requires editing the formula. Want to add M1.6 or M8 to the library? You have to expand the expression with additional
sign(abs(...))terms. - Floating-point precision. Shapr3D evaluates
sign()andabs()with Parasolid's 1e-8 tolerance, which is more than enough headroom for the integer and half-integer M-sizes this formula uses. No precision issues observed in testing. - Unreadable at a glance. Six months from now when you open the file, this expression will look like line noise. Paste the pitch lookup table as a comment or sticky note in the Shapr3D workspace so future-you remembers what it does.
If Shapr3D adds conditional logic or lookup tables in a future update, this workaround can be replaced with a cleaner expression.
File Structure and Scope
This library is meant to be a reusable reference file. The .shapr file already includes the editable history, so this document focuses on what each variable controls, why certain formulas exist, and where the simplifications are.
At a high level:
- You only need to change
threadSize_changeMe,length_changeMe, andouterDiameter_changeMeto generate a supported insert size. - The external body is driven by five axial zones and three derived radius tiers.
- The necked gap, pilot geometry, chamfers, knurls, and internal threads are all derived from formulas in the Variables panel and update automatically with the three user inputs.
- Internal threads are included for visual completeness and learning value, but suppressing them still leaves a perfectly usable reference model for enclosure design and fit checks.
- The file is intended for CAD reuse, fit checking, and visualization of common M2–M6 brass inserts. It is not intended to serve as manufacturing documentation for producing brass inserts from scratch.
Known Limitations
Thread geometry is a simplified sharp triangle, not a true ISO trapezoid. Real ISO metric threads have small flats at both the crest and root of the thread profile. This library uses a sharp triangle, apex = 60°, with a deliberate crest flat created by baseWidth < pitch, but no flat at the apex. The visual difference is imperceptible at M2–M6 scale, but technically the modeled thread has a slightly sharper root than a spec-compliant thread. For CAD visualization purposes this is fine. The library shouldn't be used to CNC-machine functional threads that need to pass inspection.
Knurl grooves are approximated as circular cuts, not true diamond knurling. Real knurling is formed by rolling hardened tooling into the brass, which creates pyramidal diamond shapes rather than clean round grooves. This library approximates the visual effect with circular profiles revolved through grooveAngle, which reads as "knurled" from a normal viewing distance but wouldn't pass close inspection as anatomically correct. Again, this is fine for visualization but not for representing the exact surface for friction analysis.
Ratios are calibrated to INCLY-brand inserts. The length and radius proportions come from measuring a specific assortment kit. Other suppliers, ruthex, CNC Kitchen, McMaster, may use different proportions, particularly for the pilot geometry. See Customization Guide for adapting.
Inserts are all double-knurled style. The library doesn't cover tapered inserts, McMaster style, single-knurl inserts, RS Pro style, or press-fit inserts. A similar parametric approach would work for any of these, but the underlying body geometry would need to change.
Pitch formula only covers six thread sizes. M1.6, M8, M10, and imperial sizes aren't included. See The Pitch Formula for how to extend.
Groove count can't exceed what fits around the circumference. On very tiny inserts, M2×2×3.2 and smaller, the default floor(OD × π) formula may produce fewer grooves than the reference real-world inserts have. The visual difference is subtle but noticeable on close inspection.
Customization Guide
Adapting to a different supplier's inserts
- Get a few physical inserts from your supplier, in different sizes if possible.
- Measure each zone with calipers and record the dimensions.
- For a single size, divide each length measurement by the total length to get ratios. Divide each radial measurement by
outerRadius(half the outer diameter) to get radius ratios. - Update the five length ratios and three radius ratios in the Variables panel. Don't accidentally divide a diameter by
outerDiameter_changeMe— the sketch expects radii. - Check that the ratios sum to approximately 1.0 for lengths. If they don't, the nominal length on your supplier's label differs from the actual measured length by that factor. You can either accept the discrepancy or apply a fudge factor like
length_real = length_nominal * 1.016.
Adding new thread sizes to the pitch formula
To add M1.6, M8, or another size, append a new term to the pitch formula:
+ 0.2 * (1 - sign(abs(threadSize_changeMe - 1.6 mm)))    // for M1.6
+ 1.25 * (1 - sign(abs(threadSize_changeMe - 8 mm)))     // for M8
Look up the correct ISO pitch value for the size you're adding, ISO 261 tables are freely available online, and plug it in as the multiplier.
Disabling internal threads for faster performance
If the file is slow on very small inserts or you do not need internal threads for your use case, suppress the thread-cut history step. The bore remains as a smooth cylinder at boreRadius (i.e. the ISO tap-drill diameter), which is still perfectly usable for enclosure design, spacing checks, and most reference workflows.
Files Included
Published packages (see Printables or GrabCAD) typically ship:
brass-insert-master.shapr— the master Shapr3D file with all variables and historybrass-insert-[size].step— individual STEP exports for each of the 18 common sizesbrass-insert-[size].stl— individual STL exports for each of the 18 common sizesREADME.md— a condensed version of this documentation for quick referencepitch-lookup-table.png— optional visual reference for the six ISO pitches (when included in a given release archive)
Credits and License
This library was designed, measured, and parameterized by Shreyash Gupta as part of the OffGrid Devices project, a small hardware business making MagSafe-compatible enclosures for mesh networking devices. The work was done in Shapr3D 5.8 or later. Variables and expressions were introduced in 5.800, February 2025.
Reference materials consulted during development include CNC Kitchen's heat-set insert design guide, the ISO 261 metric coarse thread standard, and the Shapr3D community forums. Dimensions are calibrated to a 440-piece INCLY brand assortment kit.
The file is released for free use in any project: personal, educational, or commercial. Attribution is appreciated but not required. If you extend it, different suppliers, more thread sizes, different insert styles, I'd love to see what you build.
Reporting issues: If a specific size generates incorrectly or you hit a Shapr3D error on a size I haven't tested, let me know and I can verify the formulas or adjust the file.
For the story behind this project and the lessons I learned building it, see the companion blog post: What a Bag of Brass Inserts Taught Me About Parametric CAD.